We would appreciate any feedback on our tutorial guide. If you are stuck at any time, please reach out on our GitHub Discussions board.
Before starting, complete Workplace Setup and follow one setup path from Getting Started.
Step 1: Running Your API Server
Make sure you have completed all previous tutorial pages and ran them successfully. We will now be shifting our focus from the front-end of the application to the back-end API.
In your Terminal, navigate into the my-new-app directory. Once there, run the following command:
npm run apiOnce you see the screen shown below, your API server is now up and running!
Step 2: Adding Mock Data & Service
Navigate to products/api/src/services. Within the services folder, create a folder named person. Within this person folder, create an index.ts file.
└── products └── api ├── src | ├── routes | | └── graphql | ├── services | | └── person | | └── index.ts | └── server.ts └── package.jsonAdd the following code in index.ts:
// this is a mock database with name, email, company and location properties for each personconst personDB = {  dolphin: {    name: 'Danny Dolphin',    email: 'danny@optum.com',    company: 'Optum',    location: 'Atlantic Ocean',  },  whale: {    name: 'Willy Whale',    email: 'willy@uhg.com',    company: 'UHG',    location: 'Pacific Ocean',  },  penguin: {    name: 'Penny Penguin',    email: 'penny@uhc.com',    company: 'UHC',    location: 'Arctic Ocean',  },};
export const personServices = {  getPerson: async (args) => {    const data = personDB[args.msid];
return data; },};Step 3: Adding A GraphQL Schema
A GraphQL schema allows you to receive specific data from the database based on the request call. The schema allows the data to be used and displayed in the GraphQL sandbox.
Navigate to products/api/src/routes/graphql/schema. Within the schema folder, create a file named Person.graphql.
Add the following code in your Person.graphql file:
# ID is a type, similar to a String. The exclamation(!) makes it a required field
extend type Query {  person(msid: ID!): Person}
# type Person contains the information we want from the database
type Person { name: String email: String company: String location: String}Step 4: Adding A GraphQL Resolver
We will now be adding a resolver, which acts as a GraphQL query handler.
Navigate to products/api/src/routes/graphql/resolvers.ts
Import the following statement:
import { personServices } from '../../services/person';Insert the following code within the export query statement:
person: (_, args) => { return personServices.getPerson(args);},This is how your code should look like in your resolvers.ts file:
import { githubServices } from '../../services/github';import { personServices } from '../../services/person';
export const resolvers = { Query: { user: (_, args) => { return githubServices.getUser(args); }, person: (_, args) => { return personServices.getPerson(args); }, },};Step 5: Accessing GraphQL API
Make sure you are running npm run api in your terminal.
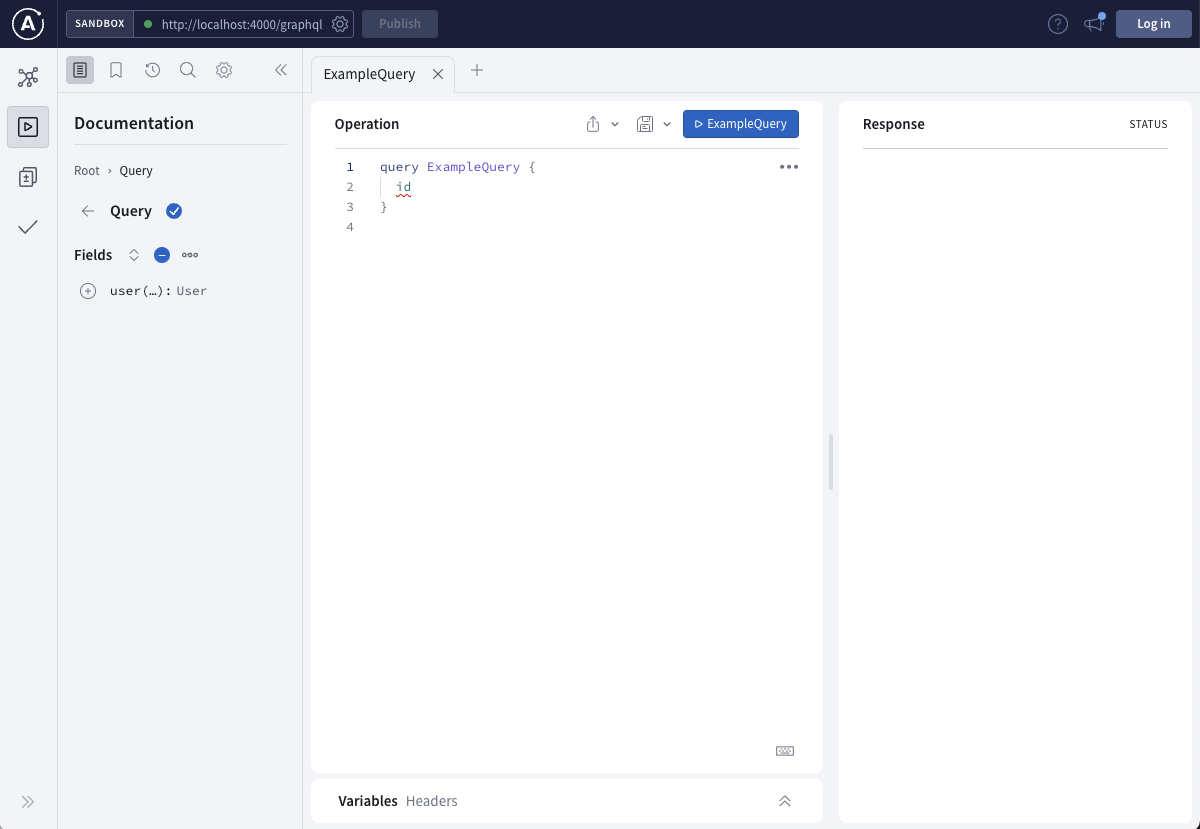
To check if you successfully created a GraphQL API, click the following link in your browser:
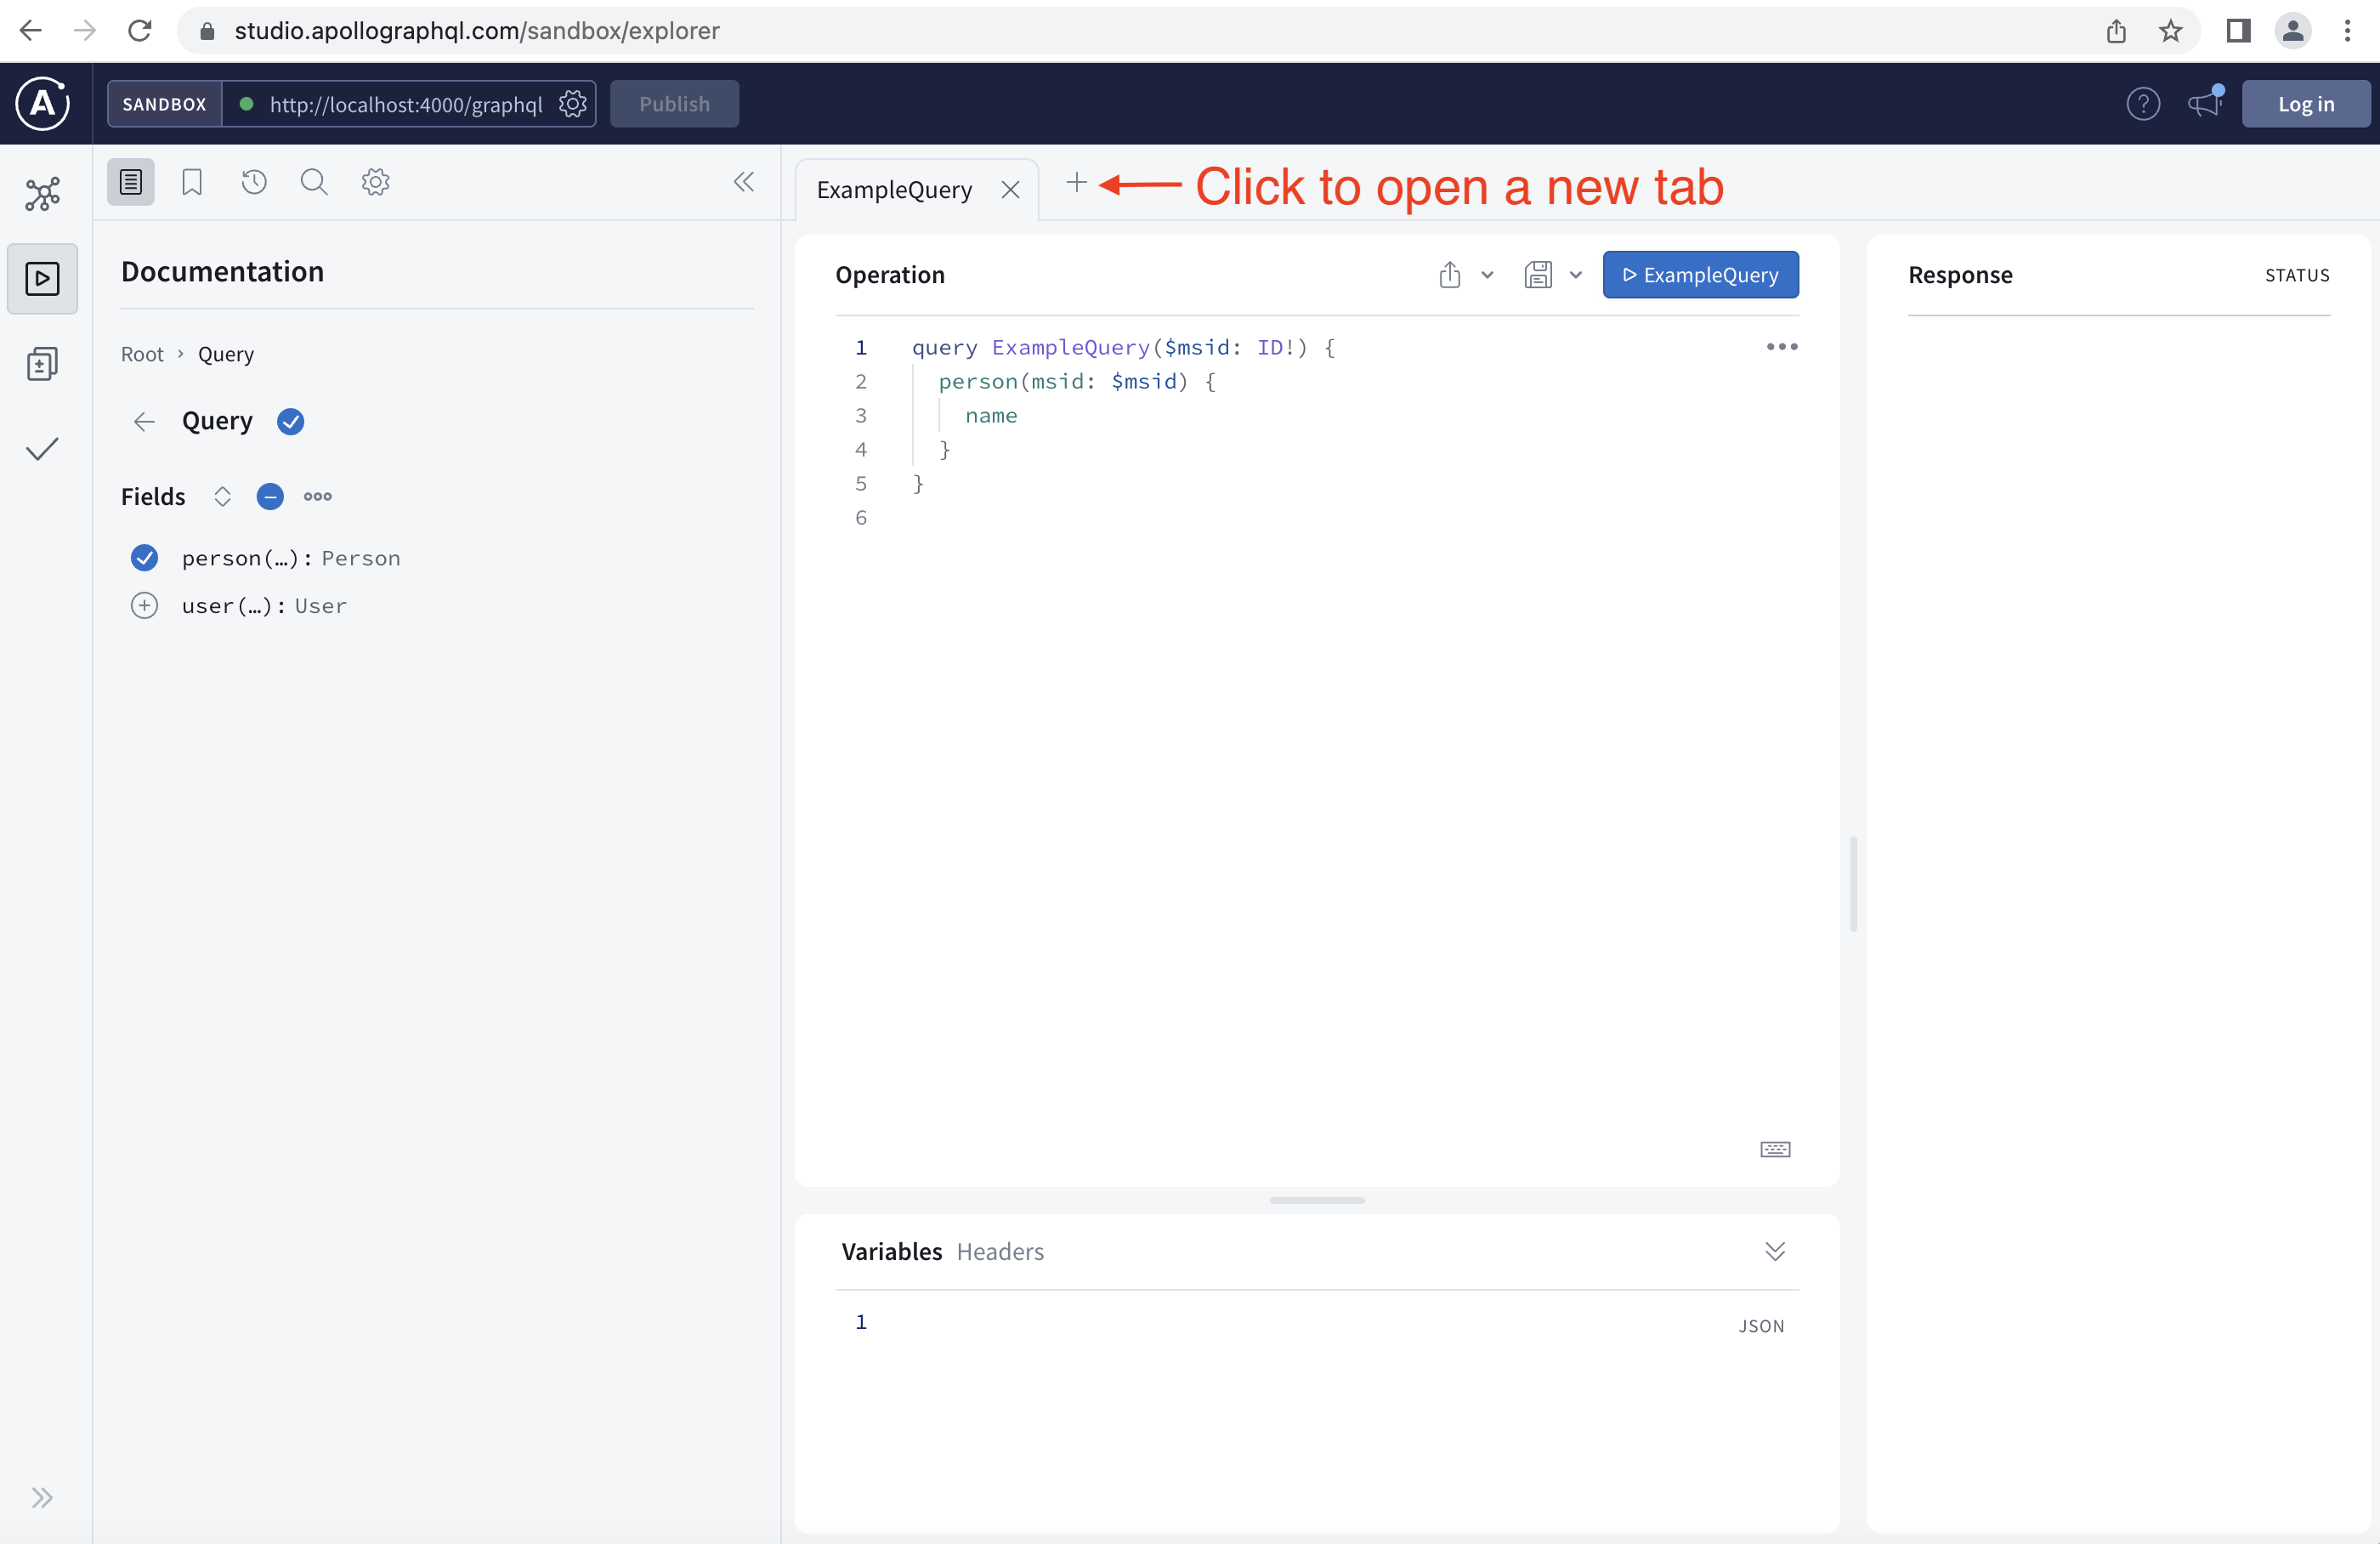
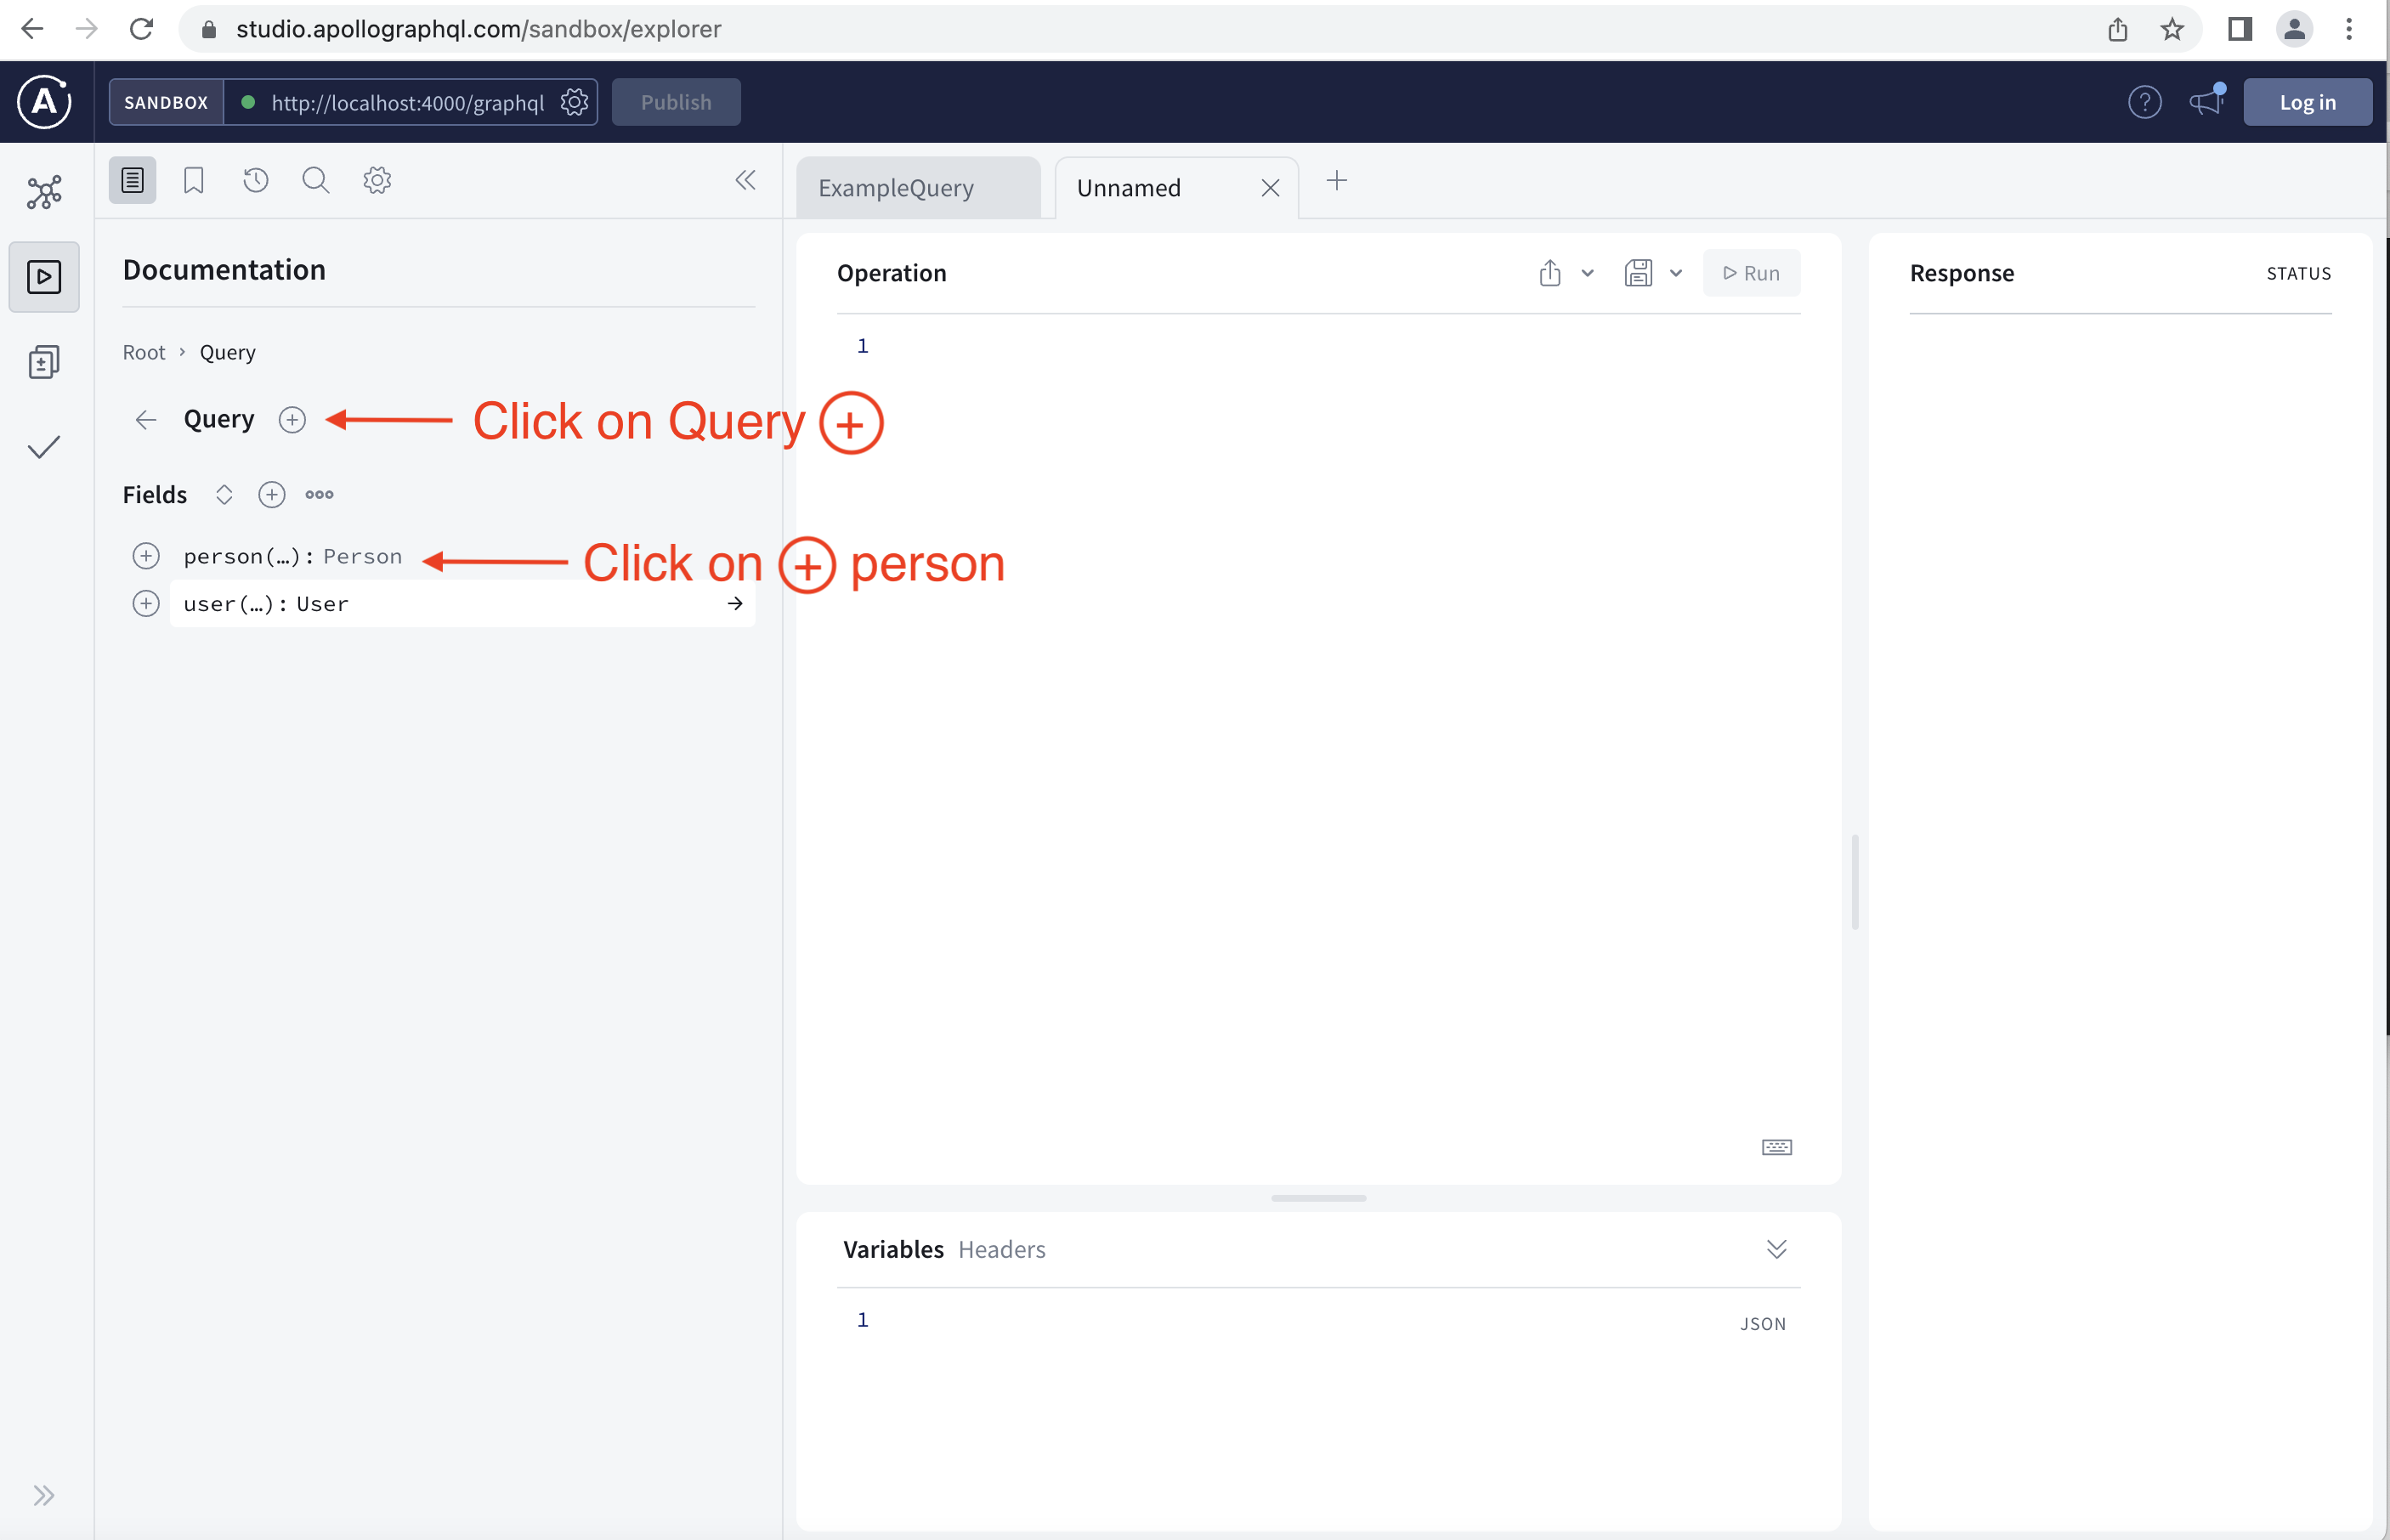
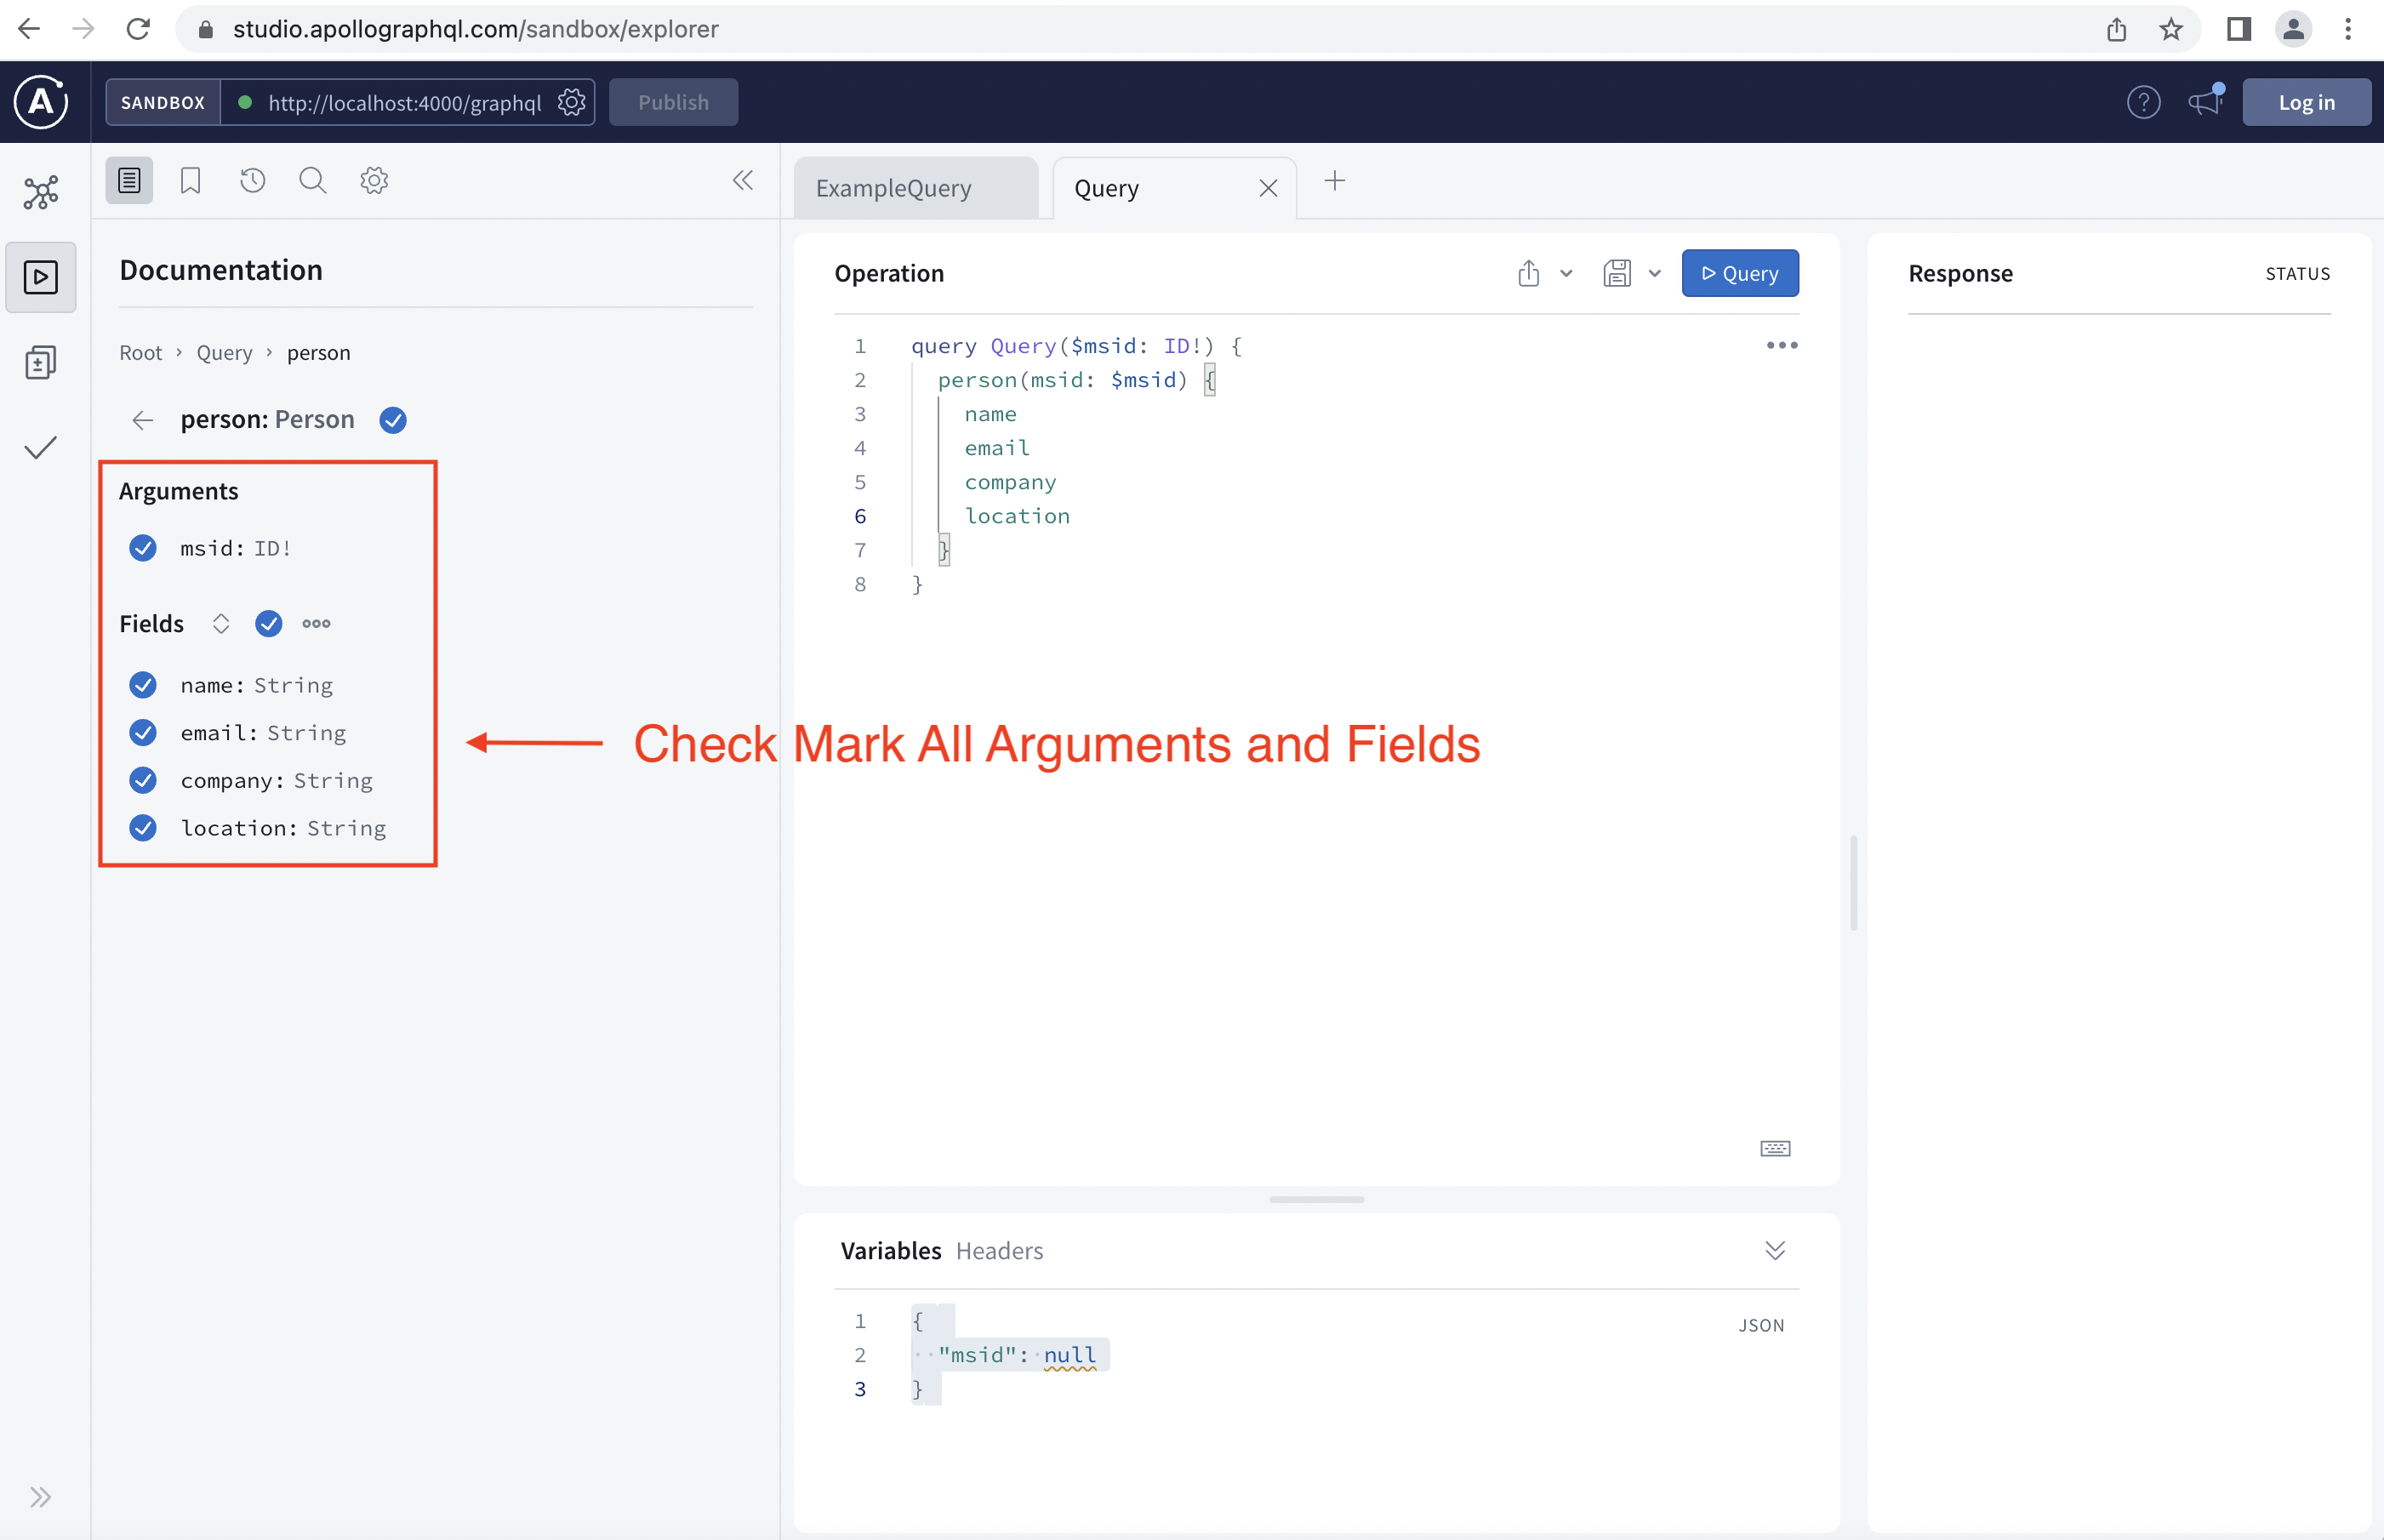
Once you launch your GraphQL webpage, follow the instructions in the following images:
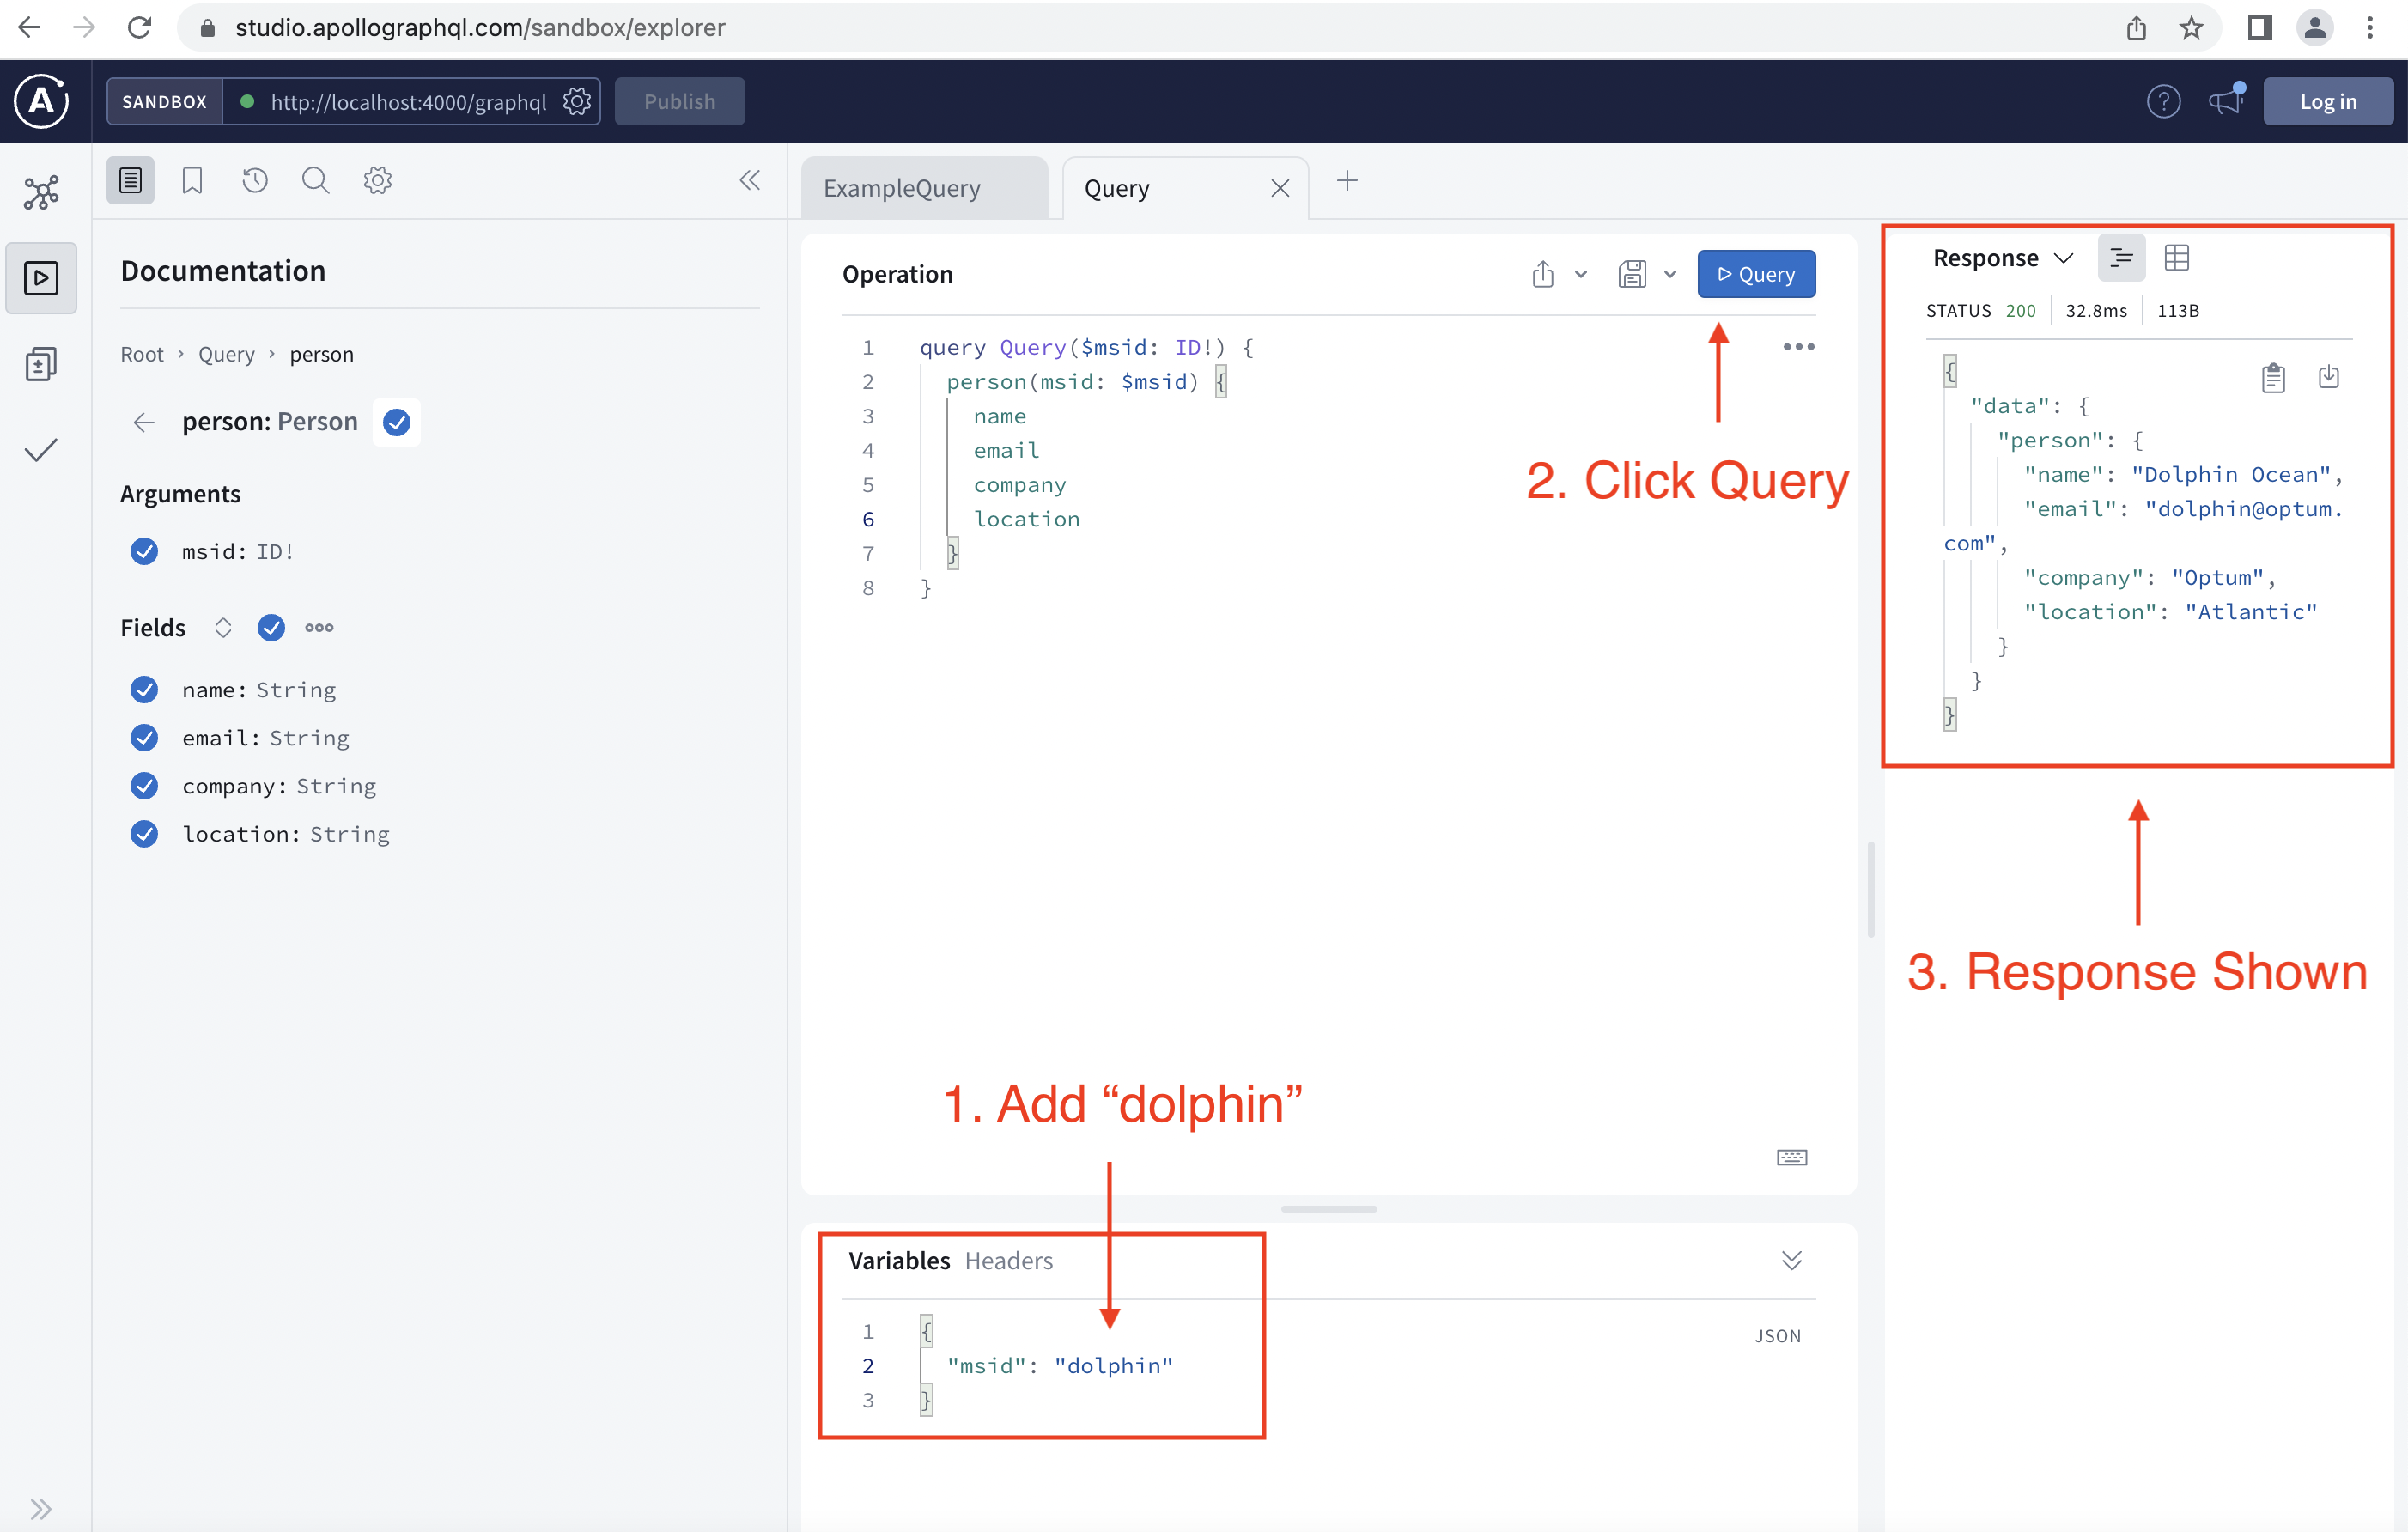
Step 6: Swapping Mock Data for Live DataSource
Navigate to products/api/src/services/person/index.ts.
Replace the current code in index.ts with the following code:
import { dataSource } from '@uhg-abyss/api/tools/dataSource/rest';
// create a connection to the GitHub APIconst personAPI = dataSource({  url: 'https://github.optum.com/api/v3',});
export const personServices = { getPerson: async (args) => { const { data } = await personAPI({ method: 'GET', path: `/users/${args.msid}`, }); return data; },};You can try inserting your msid in the variable section and click the query button to see a corresponding query response. If yours doesn't work use someone elses MSID - example: "jhollow6"
Great job, you have successfully created a GraphQL API!